Vibration Issues

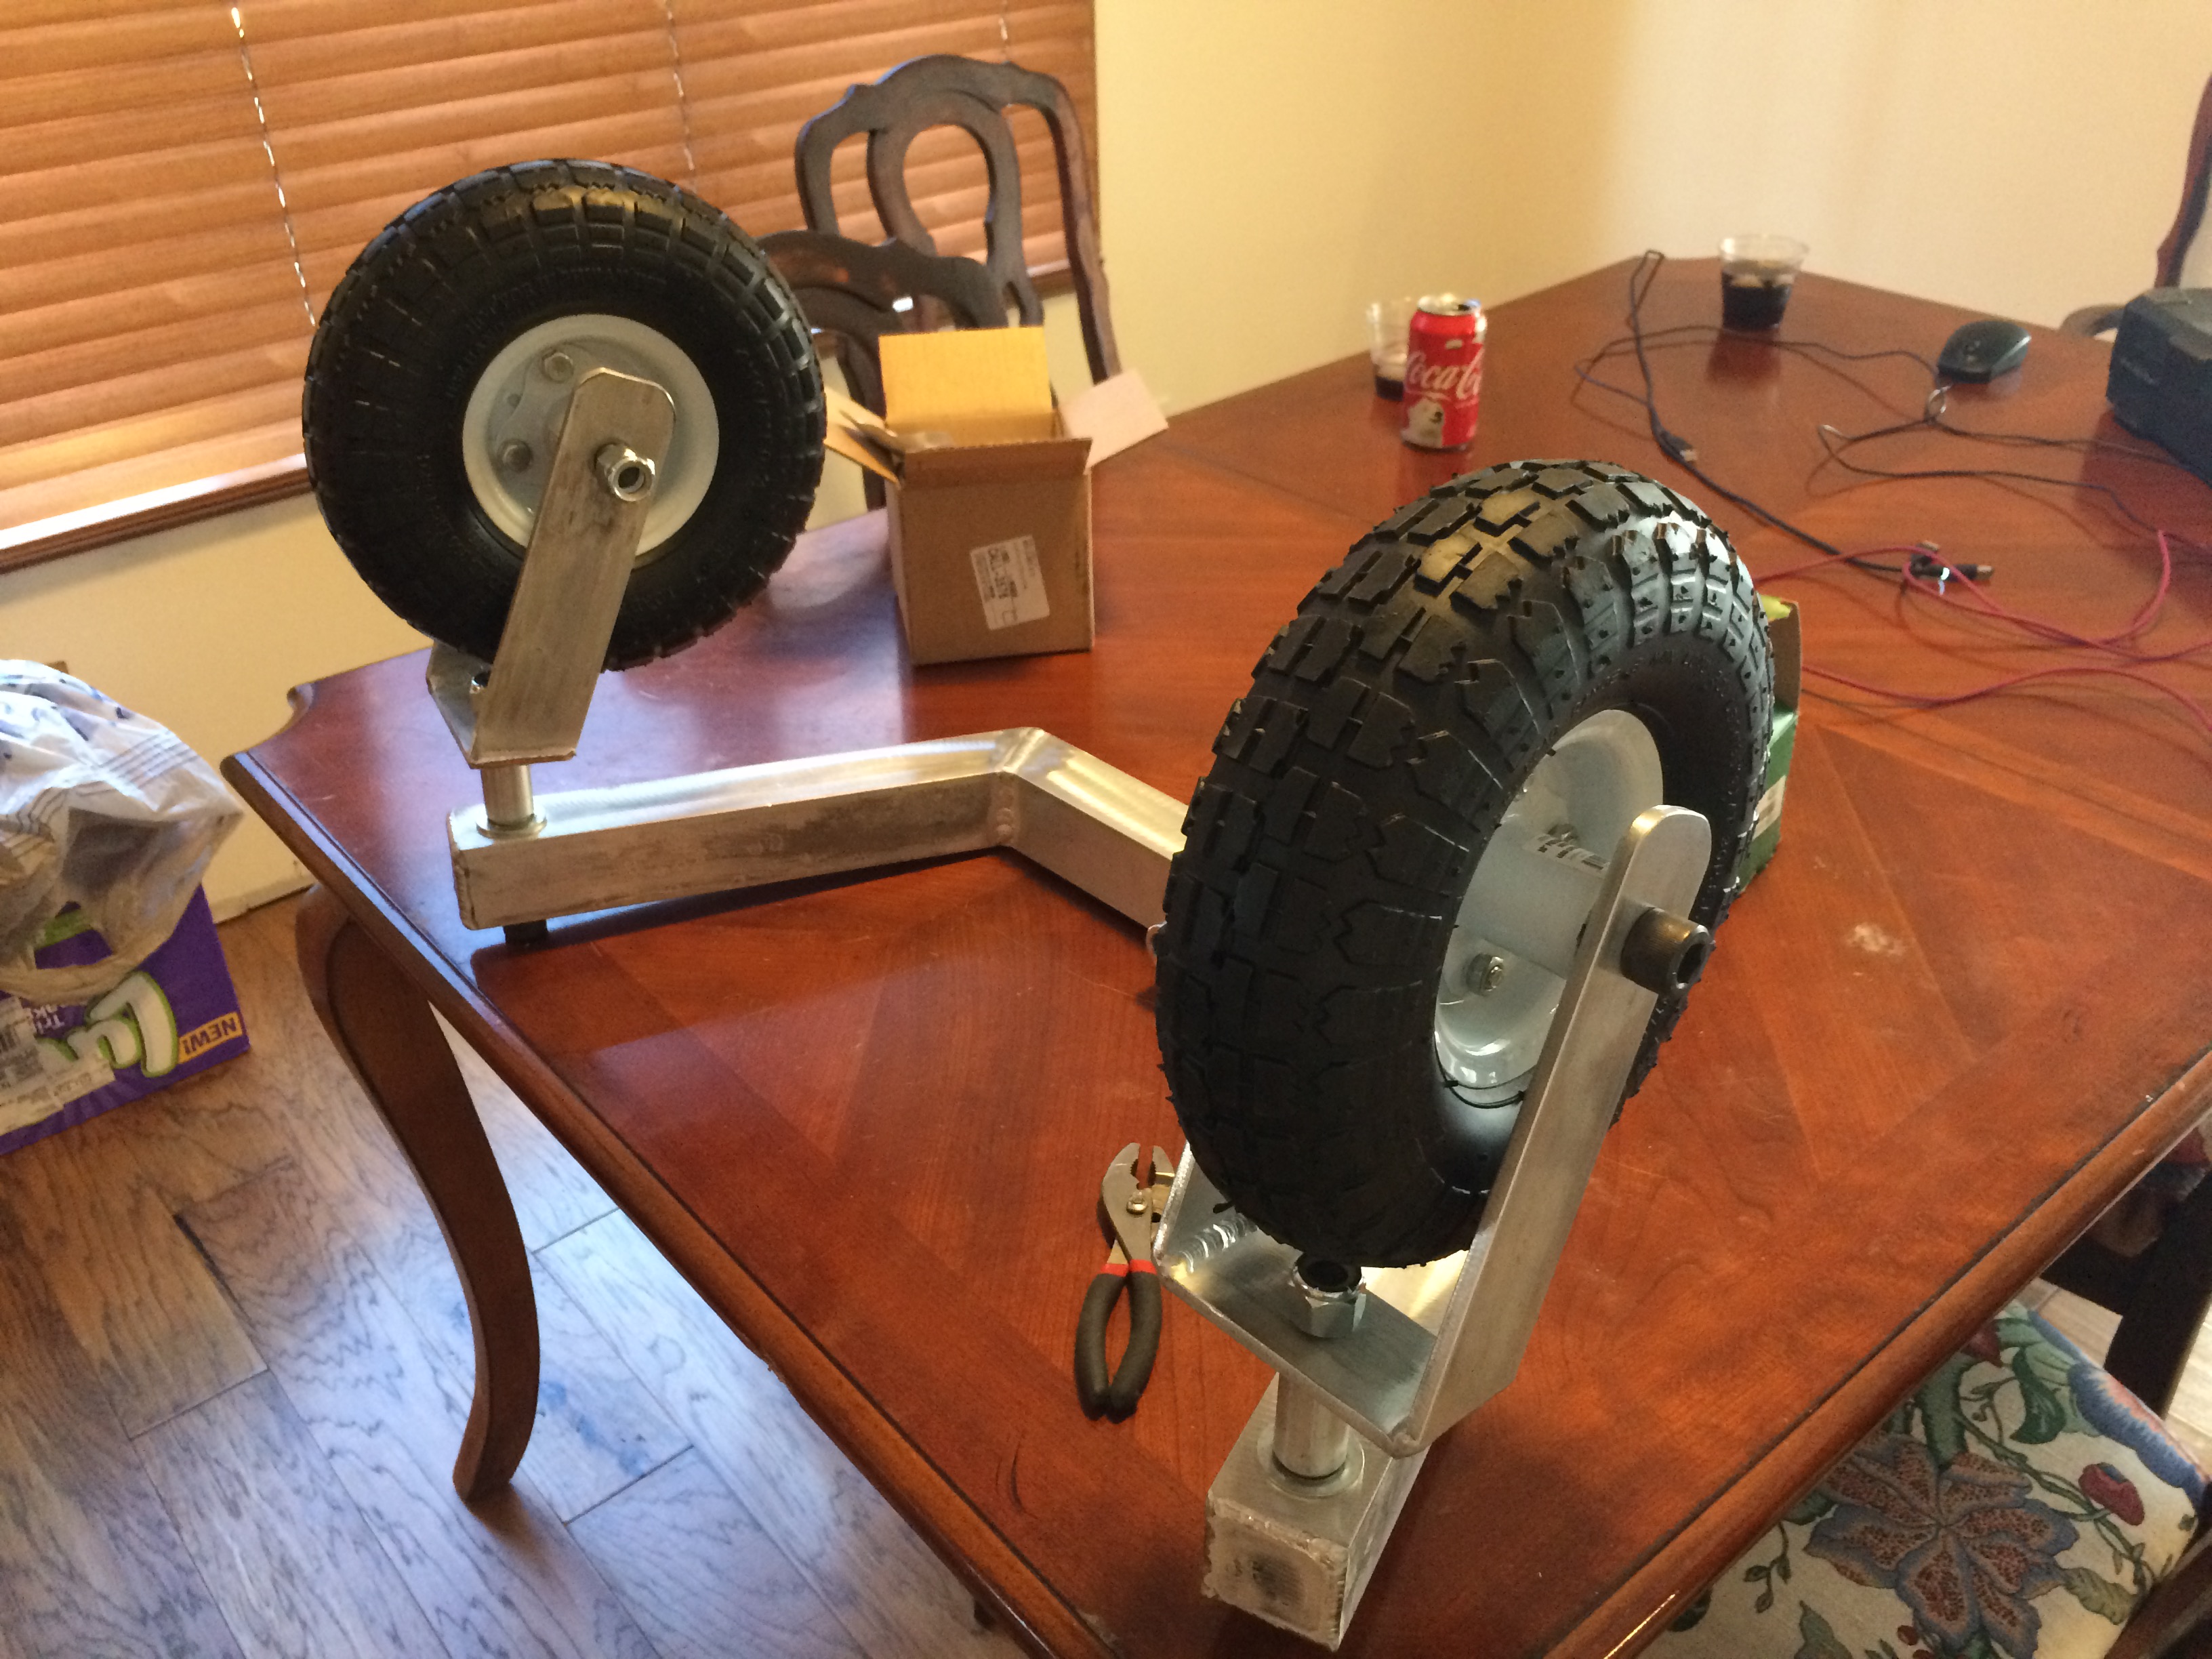
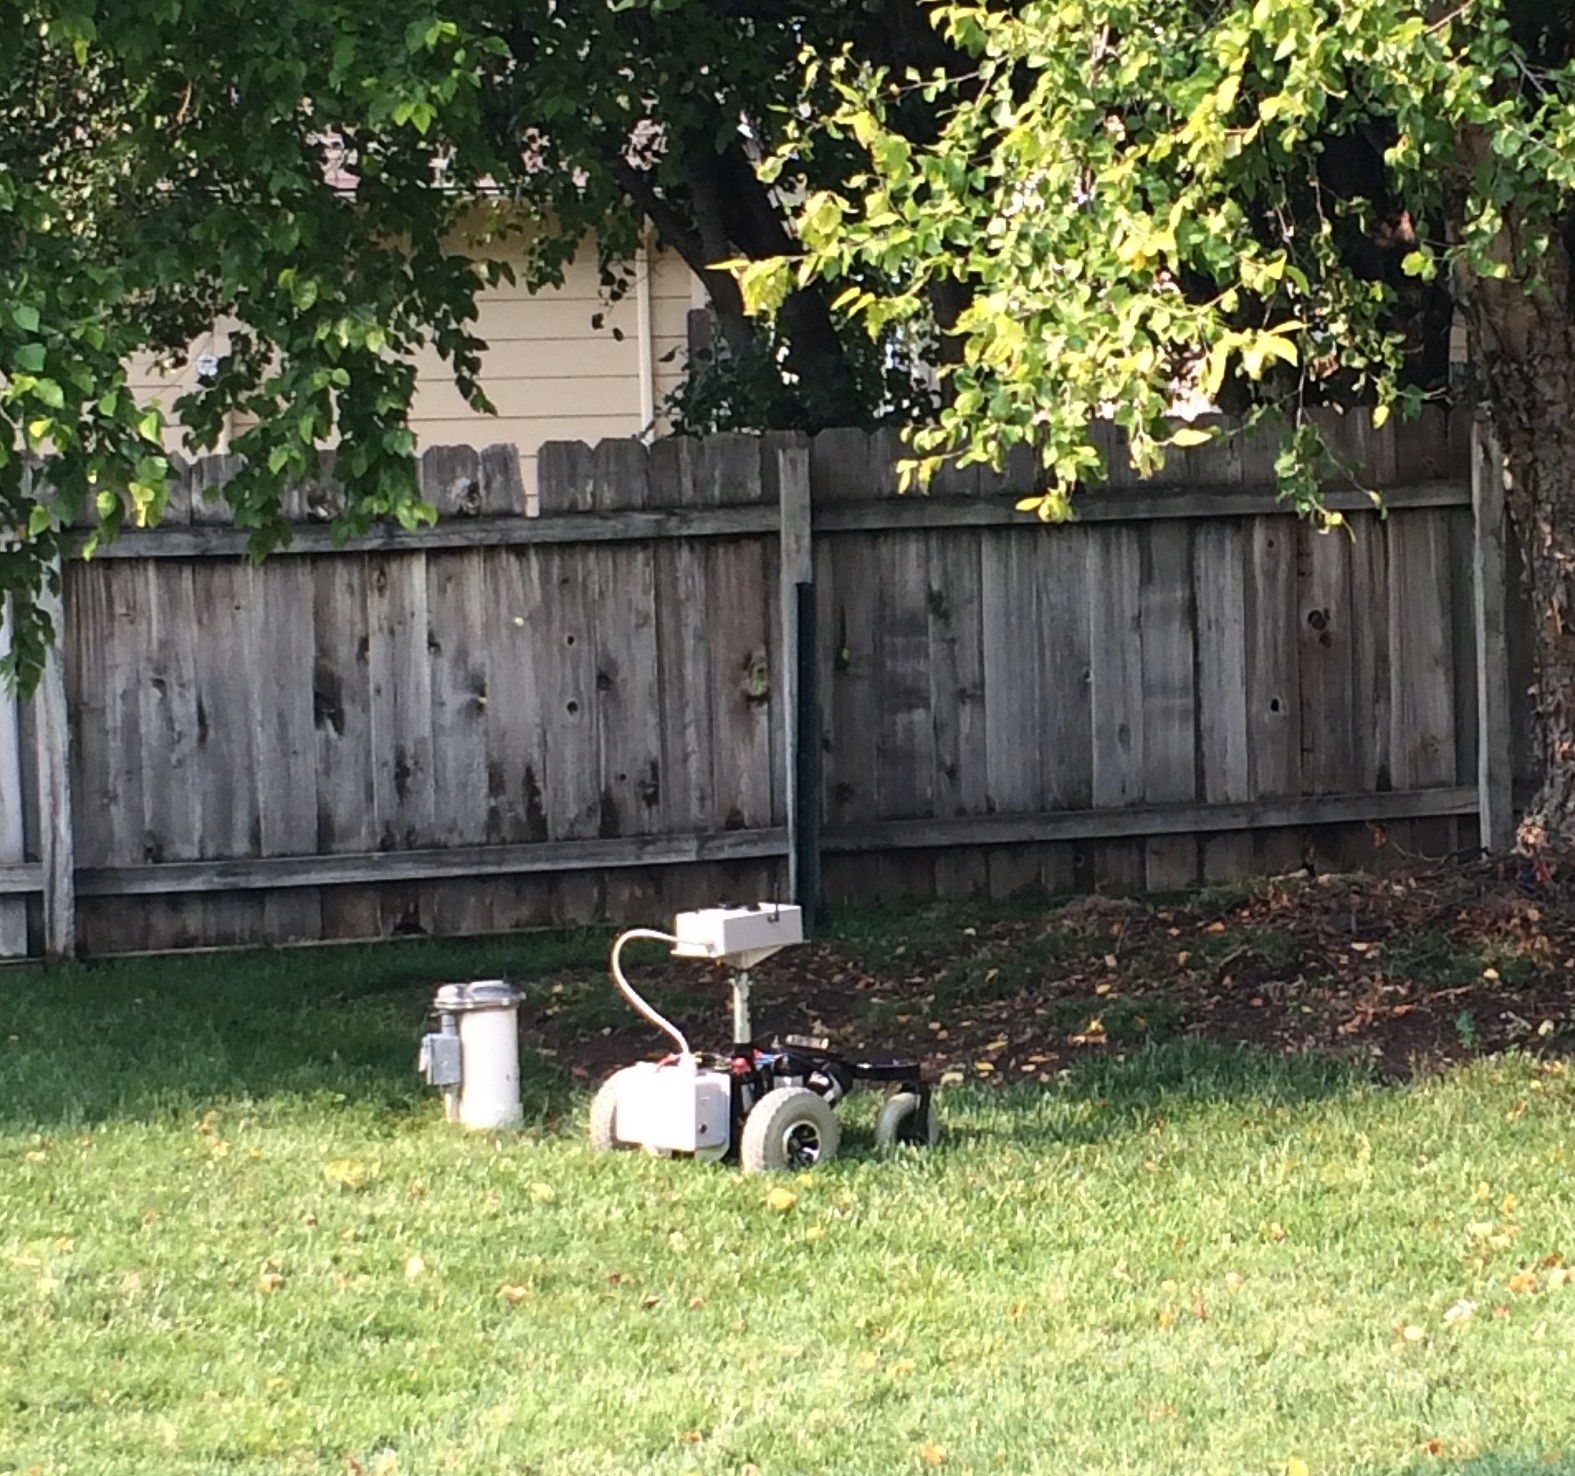
Before using the robot mower, I always power the blade motors on in my garage for a few minutes to make sure everything is working right. I pulled our vehicles out of the garage, told the missus to expect some loud noises, and made sure that Mr. Mower Jr. was safe inside the house.

The nice thing about the new motor controller I’m using on the blade motors is that I can vary the rotation speed of the blades. So instead of commanding full throttle from the get-go like I had been doing with a relay, I decided to slowly ramp up the speed. It’s pretty incredible listening to the crescendo of the blades as they spool up.

About halfway to full throttle, I started to get a ridiculous amount of vibration. It was extraordinarily loud. The vibration was so intense that it peeled open the eye of one of my deck support eyebolts.

The eyebolt on the turnbuckle supporting the mower deck. The vibration was so intense it peeled it open.

At first, I thought this was just a fluke, or that perhaps the eyebolt was already close to failure, so I replaced it with a spare and repeated the process. I’m not very smart. The result was identical.

When I was in engineering school, I had a choice to take Design of Heat Exchangers or Vibrations and Acoustics for technical electives. As you can probably guess by looking at my mower deck design, I chose Design of Heat Exchangers. It was a fun class, but pretty useless for anything mower related.

So to work through this issue, I’ve had to do some homework. Lucky for me, I managed to stumble upon a copy of Timoshenko’s Vibration Problems in Engineering at the Goodwill a few years ago, which has proven a valuable resource in my vibrations education.

Timoshenko says it better than I can, so I will quote him directly:

By an impulse or sudden application and removal of an external force, vibrations of the [spring mass] system can be produced. Such vibrations are maintained by the elastic force in the spring alone and are called free or natural vibrations.

Vibration Problems in Engineering, page 1

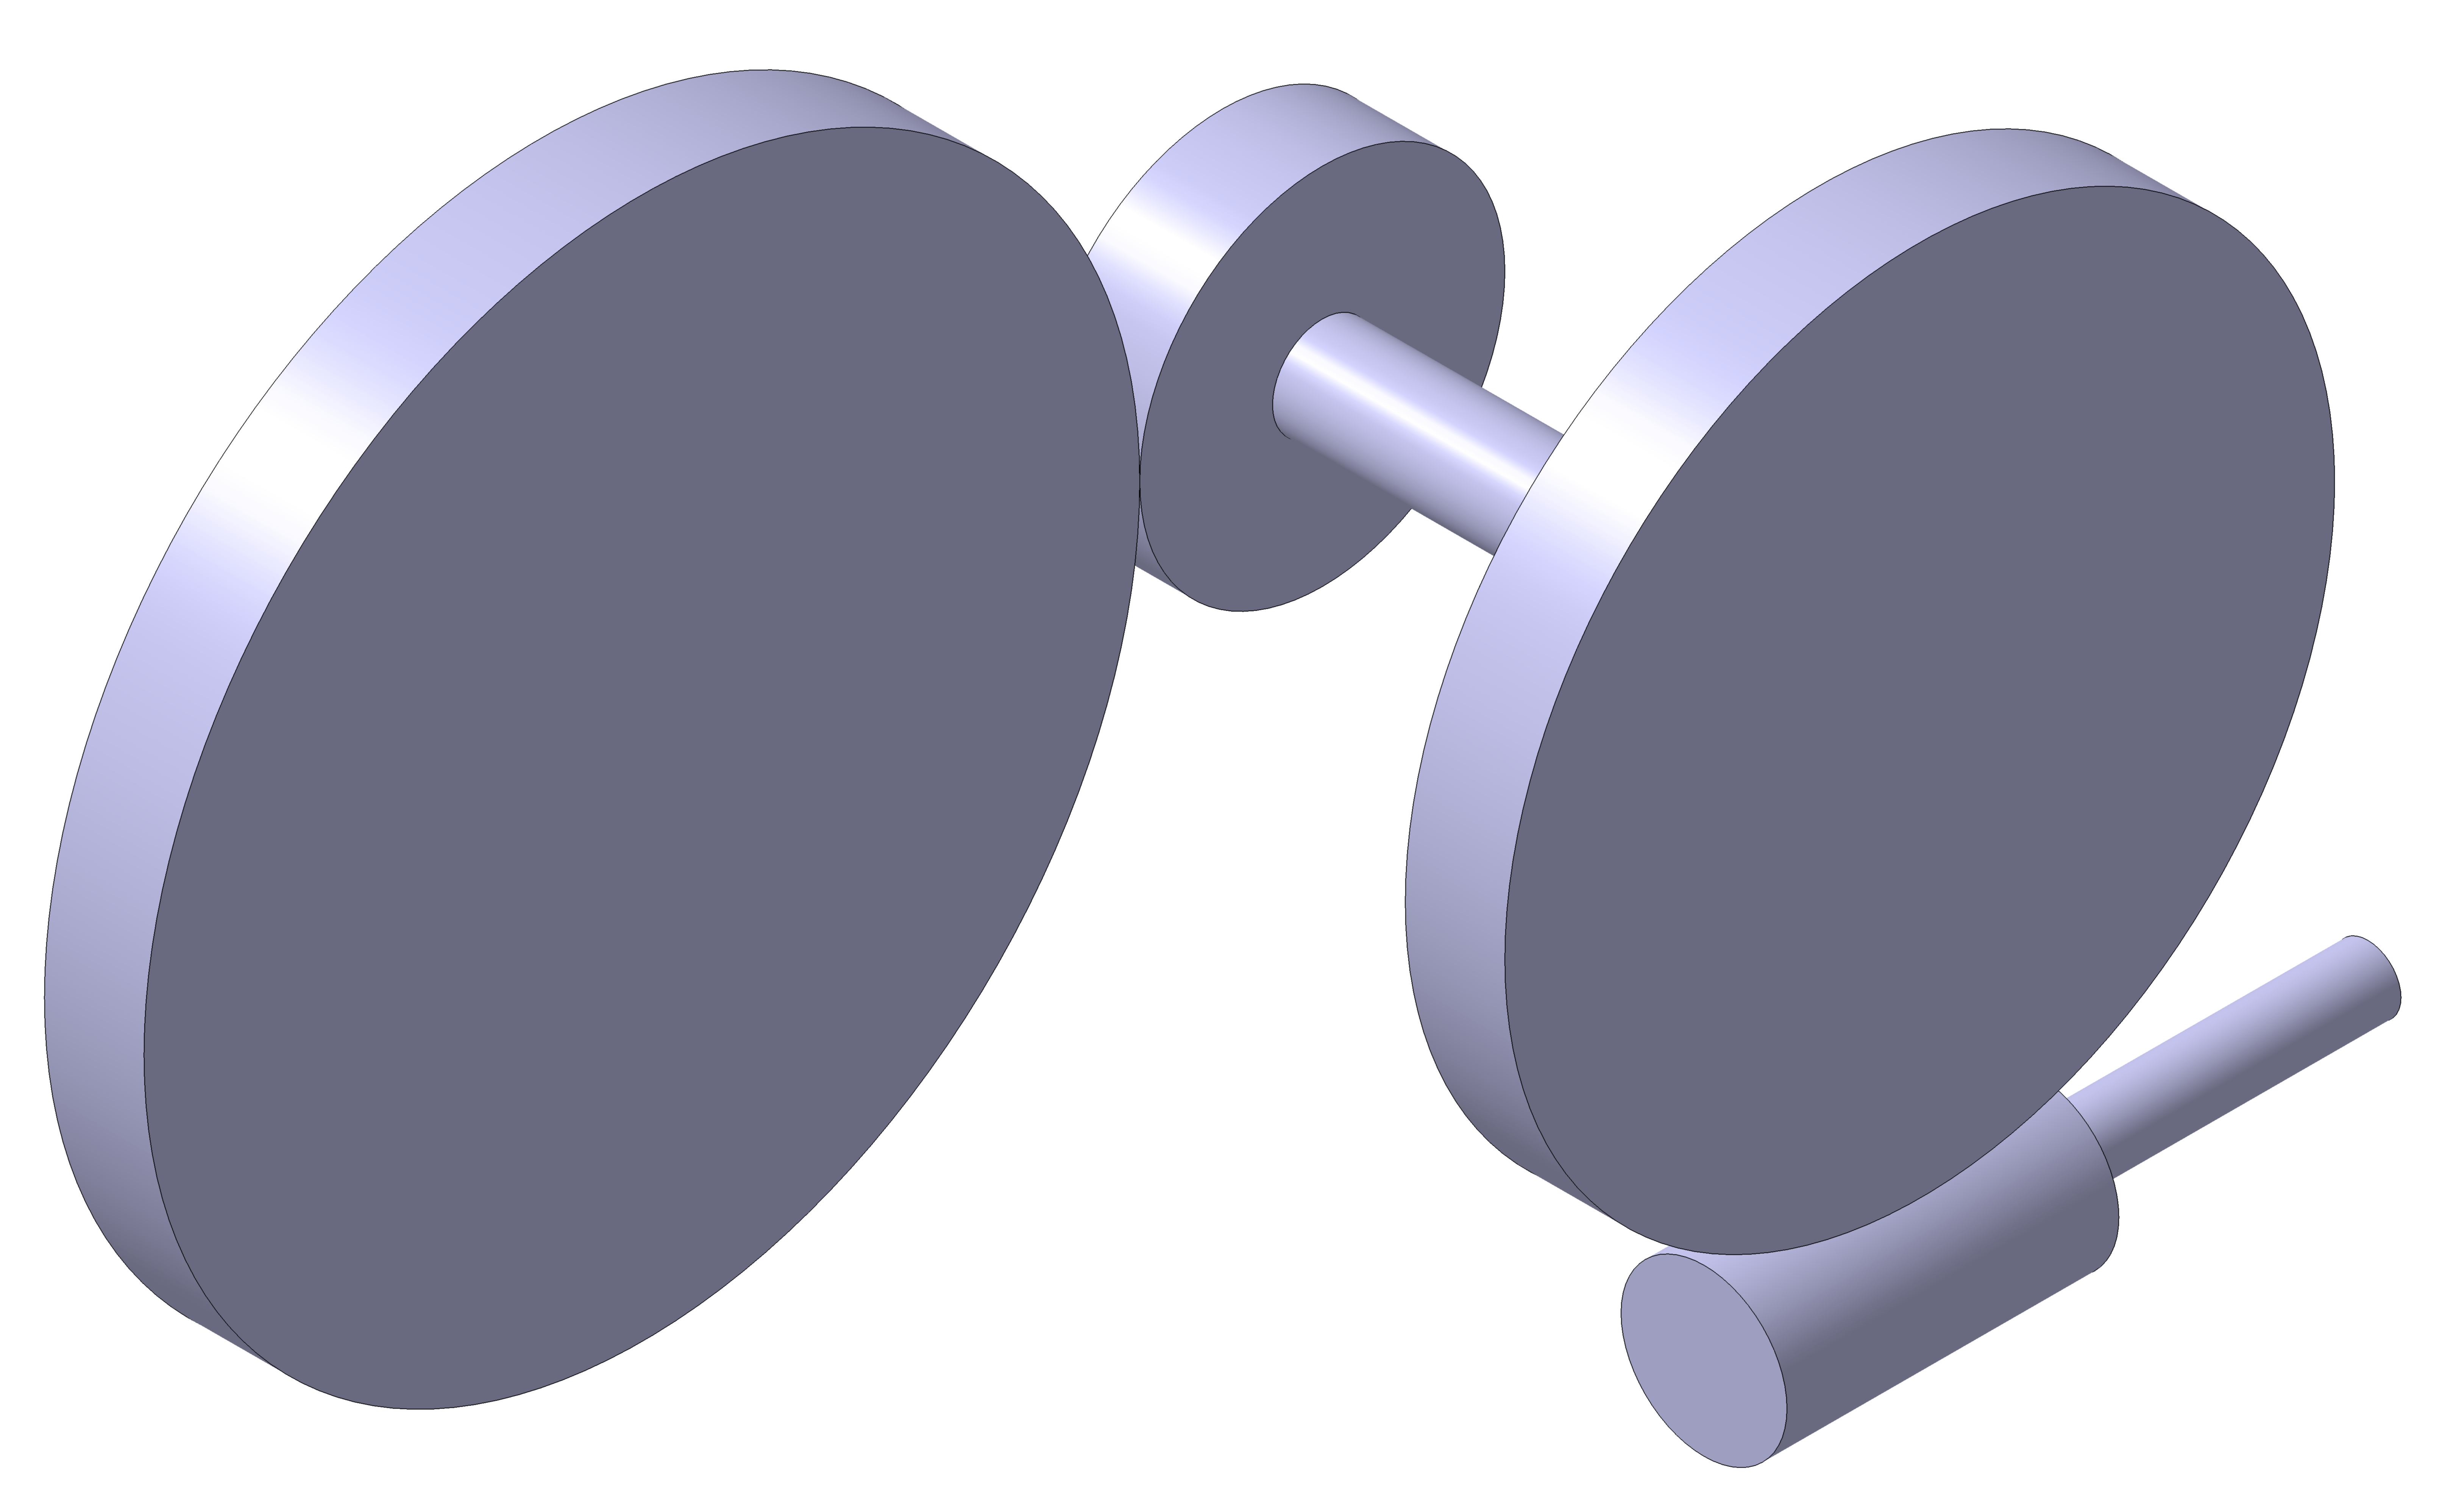
The mower deck is a kind of spring mass system, though geometrically more complex. There is a frequency at which it will vibrate if you were hit it with a hammer, just like a tuning fork will vibrate at 440Hz if you strike it against a hard surface. That unique frequency is called the system’s natural frequency, or frequency of free vibration.

Unfortunately, we’re not just hitting the mower deck with a hammer once. We’re hitting it with a hammer 4800 times per second. That oscillating force does not allow the mower deck to vibrate freely. That’s not free vibration. It’s forced vibration.

In the case of the mower deck, the frequency of that forced vibration is whatever speed the motors are spinning at. Because the motors go from zero to 4800RPM, the mower deck experiences vibration at every frequency along the way. Chances are good that the motors will create forced vibration at the natural frequency of the mower deck at some point as they spool up to operating speed.

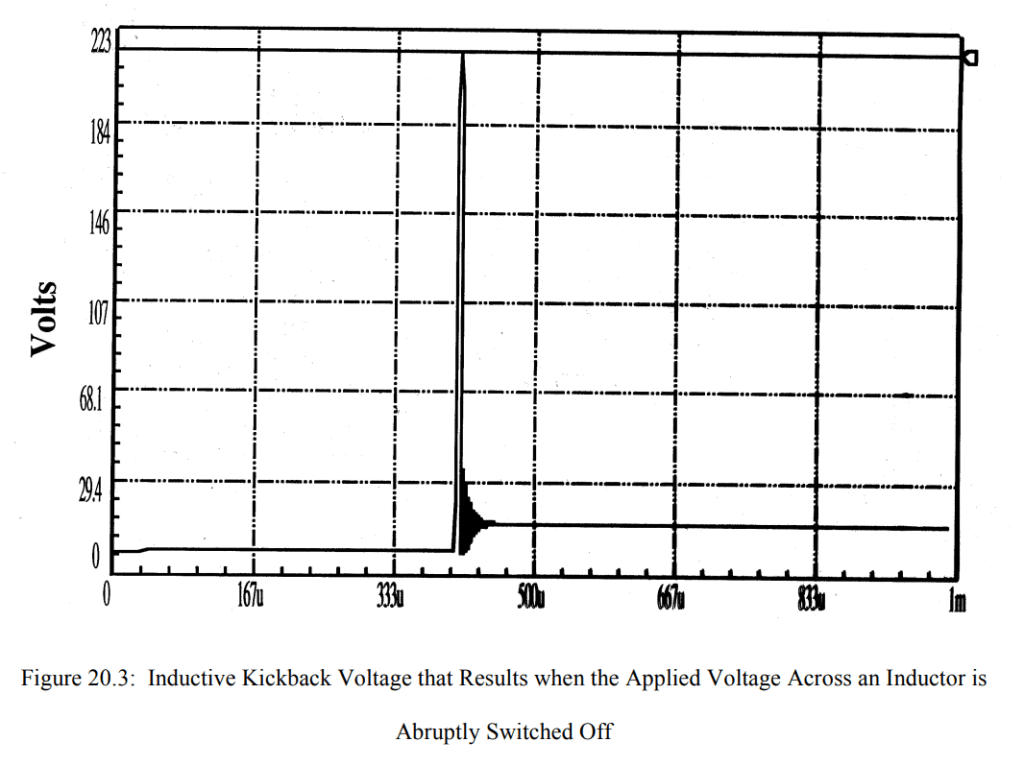
A very curious thing happens when you force a structure to vibrate at it’s natural frequency. You get resonance. And the amplitude of vibration becomes very large at resonance. Absent damping it will become infinite. Timoshenko includes a chart that illustrates this phenomenon very well.

Resonance, and the Magnification Factor, from Timoshenko’s Vibration Problems in Engineering, page 42.

When I was spooling up the mower deck motors, I consciously decided to do it slowly to minimize electrical current spikes. This created a problem that didn’t previously exist with the relay, where we rapidly turned on the motors. Timoshenko explains:

The amplitude of vibration [at resonance] increases indefinitely with time… This shows that, while we theoretically obtain infinite amplitude of forced vibration at resonance in the absence of damping, it also takes time to build up these large amplitudes.

Vibration Problems in Engineering, page 48

In other words, if we maintain forced vibration at the natural frequency of a structure, the amplitude of vibration will increase continuously to the extent allowed by any damping present in the system.

By slowly increasing the speed of the motors, I was allowing the mower deck to experience resonance and the accompanying large vibration amplitudes for a period of time long enough to damage the turnbuckle eyes. Who’d have thought?

Something else I noticed was that I had trouble getting the motors to speed up once they were at speeds close to the mower deck’s natural frequency, when it started vibrating really bad. Timoshenko has something interesting to say about that, too:

Experiments show that if any vibrating system is once allowed to reach a steady state just below resonance, it then becomes difficult to accelerate the machine through the resonance condition. Additional power supplied for this purpose is simply used up in increasing the amplitude of vibration rather than the running speed of the machine.

Vibration Problems in Engineering, page 48

I think I have a good grip on what the problem is. Next post I’ll discuss some things that can be done to mitigate this surprising issue.

Wiring Improvements

I’ve spent most of this winter re-wiring the robot mower. In hindsight, I should have spent a lot more time planning the wire runs. I made a lot of design choices about how the chassis should look and where enclosures should be located that are inappropriate given my more complete understanding of how the wires need to be connected between components.

At some point you have to build something that’s not perfect and work through the bugs later. It’s against my nature to operate that way, but if I hadn’t started building the robot mower in reality at some point, it would still be a picture in my CAD program.

In the rest of this post, I’ll describe some wiring related improvements I’ve been making to the robot mower.

The original power enclosure. The phrase “rat’s nest” comes to mind.

The picture above is how the power enclosure used to look. It used to contain the Sabertooth 2X60, the voltage/current sensor, the BEC, a positive and negative terminal stud, a small 5V relay board to trigger two larger 50A relays, a power switch and an XLR charging port. It was a mess, to say the least.

The reorganized power enclosure. No relays or terminal studs, just two motor controllers and a BEC.

The reorganized enclosure contains the Sabertooth 2X60, the BEC, power switch, XLR charger port, and a motor controller for the deck motors exclusively.

The reason I tried to pack so many components into the power enclosure was so I didn’t have to put anything other than wires in the battery bay. It is a battery bay, after all. I was hoping to make an entirely modular power enclosure I could build up separately from the robot and then basically bolt on.

While that’s nice in the CAD software, in reality it didn’t work. If I’d selected a larger enclosure it might have been possible. But an unintended side effect of putting everything in one enclosure is that you have to run 24V and ground into the enclosure, but you then turn right around and run a ton of wires right back out of the enclosure.

As I have learned, relays are not a great way to control motors, especially if they’re using a lot of power. And on top of that, those “200A” relays were kind of a scam. They terminals are only rated for 50A, and I’m pretty sure I managed to fry one out in the field. I decided to replace them with a single channel motor controller that can supply up to 200A of current.

The nice thing about having a motor controller driving the deck motors is that I can dial back the blade speed if the mower is cutting the grass just fine. There’s no sense in running at 4800RPM when 3600RPM will do the job. I’m hoping this will allow the robot mower to run for a longer period of time.

A fuse block for the mower deck motors.

I was using wire nuts to connect all of the deck motor wires together originally. I wanted to make things a little more professional than that, so I decided to replace the wire nuts with a fuse block.

In theory, the deck motors should only use about ~30A each at steady state, and with the new motor controller, I think I can spool them up slow enough to where a fuse doesn’t blow. We’ll see how good this assumption is soon.

One thing I like about the fuse block is it allows me to easily disconnect power from the deck motors: just pull the fuses. This makes safe troubleshooting easier. The fuses will also provide a layer of protection for the motor controller. But at the same time, a blown fuse creates exactly the situation that caused my wire failure. I intend to also have a Zener diode between the supply terminal and ground to hopefully protect against this situation, too.

Components relocate into the battery bay. From left to right, there’s an RC controlled relay board, a solenoid, the voltage/current sensor, and a master fuse block.

All of the power in the robot now runs through a MEGA fuse, and from there it runs through the voltage/current sensor. After that, it runs through a solenoid, which supplies power to the drive and deck motor controllers. The solenoid can only be powered if the E-stop switch and RC relay board are in safe states.

I also put rubber boots on every exposed terminal, including the batteries. They look a little ridiculous on that solenoid, but they are adequately insulated.

The RC controlled relay board.

The RC relay board is controlled by a switch on the RC transmitter. If the RC relay board doesn’t detect a valid RC signal, it will open the relay. This allows me to have a remote E-stop switch.

One thing I don’t like about this RC relay board: when you power it on, it automatically closes for a second, then goes open. That’s a really crappy design, in my opinion. But without the Pixhawk armed it’s kind of a moot point.

A proper ground plane for the GNSS antennas. The foil to the left was what was underneath the RTK GNSS receiver previously.

I also finally got around to putting a proper ground plane under my GNSS antennas. We’ll see how much this improves performance.

I hope to have these wiring improvements wrapped up soon. The grass is green and growing out here in Kansas!

Inductive Kickback

I’ve learned a lot about the behavior of DC motors from the book Introduction to Mechatronic Design. Much of what I will discuss in this post comes from chapter 20 of this book. Electrical engineers reading this post will laugh at how elementary some of this information is, but it was news to me as a mechanical engineer.

I find that I solidify my understanding of ideas and concepts by writing about them. So what follows is a brief book report on a phenomena often called inductive kickback, which I believe was the cause of the wiring failure on my robot.

A motor is an inductor. Inductors store energy in magnetic fields. When you apply voltage to a motor, a magnetic field is created around the motor. A unique characteristic of inductors is that they resist changes in the flow of electricity through them.

If you were to suddenly disconnect the voltage source, the magnetic field would try to keep electricity flowing through the motor. But because there is no where for that electricity to go, the voltage across the motor terminals increases instead. And it can increase to very high levels, sometimes thousands of volts.

A typical graph of Inductive kickback voltage from Introduction to Mechatronic Design.

The energy stored in the motor’s magnetic field has to go somewhere. What usually happens is the voltage becomes high enough across the motor terminals that a nearby component becomes a target for electricity to arc through and flow out of the motor.

I didn’t state it in my previous post, but to power on the deck motors I’m using a large relay. To turn them off you have to open the relay, and you end up creating exactly the inductive kickback situation described above. And with nowhere for electricity to flow, I think the voltage between some of my wires became so large that it arced through the insulation.

What could have been the ignition source for a Kansas grass fire, save for my 100A fuse.

The damaged wires in the picture above are the + voltage wire on the motors and a battery ground wire, curiously enough. And notice how close they are to each other: a perfect place for electricity to arc. Better than the contacts inside the relay, which was still functional, surprisingly.

I now know why wires are voltage rated: it has nothing to do with the conductor material or size, and everything to do with the insulation. The insulation will only prevent arcing below a certain voltage threshold. And in the field several weeks ago, it looks like I greatly exceeded that threshold, whatever it was for those wires.

I checked the Posi-Lock website, and their connectors are rated for 600V. I don’t remember where I got my wire from. I’m sure it was the cheapest knock-off stuff I could find. The insulation has no identifying marks, so I’m not sure it’s voltage rated at all.

Next post I’ll describe the changes I’m going to make to robustify the wiring and electrical components in the robot mower.

How Not to Wire Up a Robot

What could have been the ignition source for a Kansas grass fire.

If you look closely at the charts in the previous post, you’ll notice they end quite abruptly. The picture above shows why.

I have the robot mower configured so the blades only turn on when you hold the rudder stick to the right. The stick is spring loaded, so letting go of it returns it to center, deactivating the blades.

A typical shrub out in the field. Most were about 18in tall.

The field I was testing in had several large shrubs in it. One of my goals in the field was to push the envelope on what the mower was capable of cutting through, so I let it mow over several of them in autonomous mode. However, there was a particularly large shrub in the robot’s path, and so I decided to turn the mower blades off by releasing the rudder stick.

As expected, the blades stopped. But the robot stopped moving, too. This was curious: the robot should have continued driving. So I pressed the emergency stop button on the robot to immobilize it, and walked over to the truck where I had Mission Planner running on my laptop.

A screenshot of Mission Planner telemetry log after I returned to the truck. The reported voltage is 12.50V.

The Mission Planner screen was frozen as if it wasn’t receiving telemetry from the robot. It took me a few minutes to realize that the issue wasn’t Mission Planner or my laptop radio: it was that the robot wasn’t sending telemetry. And even more curiously, the voltage reading on my SLA batteries said 12.50V. I was worried that I’d really fried my batteries, so I walked back over to the robot to investigate.

Opening the battery bay I found a slight amount of smoke and that awful burnt plastic smell from melted wire insulation. But other than that everything seemed fine. There wasn’t a smoldering fire inside the robot. The batteries weren’t hot to the touch.

At first I chalked it up to too much current running through the wires. The robot uses 120A at peak current, and at those levels even a small amount of resistance could cause the wires to heat up a lot. Perhaps the wires just got hot enough to melt the insulation and came into contact right at the moment I decided to shut the mower blades off?

One of the melted wires. The yellow blob on the end is a portion of a Posi-Lock.

This just so story didn’t sit well with me. What an awful coincidence that the wires failed at exactly the same moment I was shutting off the motors, especially after the robot ran fine for five minutes prior. Why didn’t they fail earlier?

Additionally, why didn’t the exposed wire conductors fuse together after they came into contact? I’ve heard of people using SLA batteries smaller than mine to spot weld 18650 battery tabs together. The wires were really close together, but weren’t touching when I opened the battery bay. And the wire strands don’t seem to be melted judging from the picture above. Which was extraordinarily lucky, given how bad that could have been.

I did have enough sense to put a 100A fuse on my batteries. It seemed logical that the fuse was what saved my bacon. But using the multimeter to test the fuse revealed that it was not, in fact, blown. At this point I was completely bewildered. I thanked the good Lord that the robot hadn’t turned into a massive lead acid fireball, made sure all my batteries were all disconnected, packed up, and went home.

I’m sure readers are ready to scold me for all of the janky things going on in my battery bay, and I certainly deserve that criticism. My mantra is make it robust, and I definitely did not live up to that standard with my wiring. Below is a full picture of the battery bay.

The robot mower battery bay. How many janky things can you spot?

I have my own list of janky things in here that I intend to fix. What do you see that is janky? Feel free to comment below!

In the next post, I’ll explain what I think went wrong, and the improvements I’m going to make to mitigate the problem and eliminate all the redneck wiring I’ve got going on.

Sub-Assembly

I’ve received a few of the weldments back from the shop. While I wait for them to finish fabricating the mower deck weldment I’ve started to put some components together.

IMG_4701
How I initially had the wheel encoders installed. You can see a little rubber grommet in a hole I drilled in the motor dust cover near the bottom  of the picture.

Back when I installed the wheel encoders on the wheel chair motors, I stupidly drilled a hole through the dust cover on the back of the motor so I could run data wires to the encoder. In hindsight, I should have run them through the little sleeve that the power and brake wires were routed through.

I had to take the brake off to put the encoder on the motor anyway, so there was a perfect amount of space for the encoder wires once the brake wires were removed from the sleeve.

Because you can’t undrill a hole I purchased a pair of cheap gear motors off eBay for $80. I mostly wanted them for the motor dust cover, but it will be nice to have spare parts on hand in case I need them down the road.

I took the aluminum back piece off the motors and removed the two white wires you see in the picture. The hole you see them sticking through was where I routed the data cables for the encoder.

Pro tip for dealing with these motors: There are two Philips head M5x150 screws holding the aluminum back piece to the mounting plate. These screws have lock washers under them. The screws are ridiculously soft and easy to strip the heads on. If you want to remove them so they’re still reusable, it’s best to use an impact driver. It’s extremely easy to strip them using a screwdriver.

I managed to strip the screws on both motors before I drilled them out and discovered this, so heads up to anyone modifying the motors like I am here. I ordered replacements that were socket head cap screws instead, hoping to avoid this issue in the future.

Once you have the aluminum back piece off, you’ll see wires inside like this:

IMG_5002
The inside of the aluminum back piece.

The inside is going to be quite dusty with a lot of little brush particles inside. I blew it out with compressed air after taking this picture.

You can pull the white wires through pretty easily, but I had to bend the black wire terminal so I could get access to the hole to feed the encoder data cables to. I also ended up removing the brushes so I’d have more room to work.

Once you’ve got the white brake wires removed, you can pretty easily push the encoder wires through. The end result looked like this:

IMG_5005
How I should have routed the encoder data cables from the start.

One thing I realized doing this is that it would have been pretty easy to drill holes into the aluminum back piece for screwing the encoder base down. I selected an adhesive backed encoder because I didn’t want to mess with it. But going to the trouble to take it apart like this changes that calculus. If I find myself doing this again, I’ll order an encoder that has clearance holes for mounting screws.

IMG_5009
The completed motor assembly with the Harbor Freight tire.

After I had everything wired up, I tested the encoder to make sure it was working well. Nothing like having to tear down a motor after it’s already on the robot to fix a loose wire.

I also wanted to make sure that running the data cables next to the power supply cables wouldn’t cause any issues. I didn’t find any during the bench test. Fingers crossed none pop up in the field either.

IMG_5085
The front caster assembly. A little bigger than I expected!

I used 5/8-11 screws for all the connections in the front caster assembly. I wanted to standardize on one size so I could buy several of one type of lock nut. Unfortunately the width of a 5/8-11 lock nut is 0.9375in and I don’t have a wrench that size. I also don’t have a hex wrench for the socket head cap screws either. The picture above shows everything hand tightened. I’ll have to go pick up the right tools to get this all put together.

More to come soon!

Where Does All That Power Go?

I’m estimating the electric deck motors on the robot lawn mower will use about 168A of current collectively, and at 24V that means they consume just over 4kW or 5.3hp of power. Even in a worst case scenario, saying that aloud sounds ridiculous. Really? Where is all of that power going?

Remember that power is equal to torque times angular velocity. The angular velocity of the mower blade is governed by the blade tip speed limitation of 19,000ft/min. The linear velocity of the blade can’t exceed this value. If we know the blade length, we can do the math and determine the necessary angular velocity to achieve that blade tip speed.

velocity
The maximum angular velocity of a 21in mower blade for compliance with ANSI B71.1-1990. Don’t forget the calculation between radians and revolutions.

So we have a very good handle on angular velocity. The mystery variable in the power equation is then torque. The amount of torque we need when the blade is spinning is going to determine how much power the motors are going to consume.

In my previous power calculations, I made a huge assumption:

I have no clue how much torque a mower blade needs. Let’s just use whatever my 21in Toro push mower outputs. It mows grass pretty good. Close enough.

-Me, making poor decisions

The engineer in me loves that assumption. Find the appropriate RPM, pull up the power curve for the engine and boom, there’s your torque value on a silver platter.

The problem is that the robot lawn mower and my Briggs and Stratton push mower are two different animals. I should have made this chart a long time ago, but here is the performance curves for the E30-400 electric motor compared to a Briggs and Stratton 450e gasoline engine, typical of a push mower with a 21in wide deck:

Gas Versus Electric Comparison

The chart above makes more sense when you remember that the 450e gasoline engine is paired with a 21in long blade, but the robot lawn mower has 12in blades. This is why the electric motor curves go all the way to 5,700RPM whereas the gasoline engine curves end at 3,600RPM. Their respective blade length gets you close to the allowable blade tip speed.

Remember that these curves represent the maximum torque and power created at a given speed. When you’re mowing your lawn, how often does your mower bog down? Not much, hopefully. If it’s designed well and your grass isn’t a foot tall your mower probably isn’t operating at it’s maximum torque or power.

Because you shouldn’t often need the maximum torque or power out of your mower engine, the guys that engineered them installed a cleverly designed throttle governor, which varies the amount of fuel and air fed into the engine in such a way that its speed stays in a narrow RPM band.

Instead of letting the engine spool up to the fastest speed it can achieve under a given load, the governor limits speed of the engine, and subsequent power output, making it more efficient. If you need more torque or power, it adjusts the air and fuel mixture accordingly. The governor also ensures the blade tip speed stays safe.

This is where my power calculations go off the rails. I’m using the maximum torque values from these curves (measured in laboratory conditions no less) and sizing an electric motor such that it can achieve this torque value. This is inflating the estimated current these motors will consume.

Remember the motor from the electric push mower I got off Craigslist? It doesn’t appear quite so undersized now, given that our gasoline engine is likely operating somewhere below those maximum torque and power curves.

Our E30-400 electric motor, on the other hand, has no throttle control. This makes the analysis simple: it will always be operating at the curves on the chart above. A brief look at the chart shows that it should still perform very well.

Under no load, it will spin at 5,700RPM. As the required torque increases, the motor speed will drop, but the total power output from the motor increases until the motor is spinning at 2,900RPM. At this power output, one single motor is almost generating the power created by the 450e gasoline engine. Nice!

So realistically, the 168A of current for all three motors is probably on the high side. By how much, I am unsure. But I suspect it’s a significant amount. The robot lawn mower uses three of these motors. Collectively, I would imagine they won’t need too much torque to spin through whatever resistance they encounter.

This is looking more and more like a problem best solved by experimentation, not analysis…

Correction: The Magic Number is Exactly 32

Because the ratio I measured a few days ago was a strange non-integer ratio, I decided to open up the gearbox and count teeth. It was frustratingly messy, to say the least.

IMG_4381
Inside the wheelchair motor gear box. Lots of grease! This was after I had taken out about 80% of all the grease.

I was hoping to be able to count the number of teeth on each gear without taking the whole thing apart, but this proved quite difficult. There’s not really a good way to mark a tooth when the whole thing is swimming in grease.

After a while, I decided to sit down and do some math. It was a flashback to my old engineering school days. I was able to count the teeth on some of the gears (with a fair degree of confidence) and using this information, the problem statement became:

A gearbox has a gear ratio of 31.8. There are four gears in the box. The output gear has 32 teeth. The gear connected to the output gear has 11 teeth. A second gear with an unknown amount of teeth is rigidly attached to the same shaft as the gear with 11 teeth. This gear is then driven by a worm gear connected to the motor. How many teeth are on the second gear?

With most word problems, I find myself drawing pictures to make things more clear. I made a simple CAD model of this setup to try and get a better grip on how the gears worked together.

gear model
A simple model of the gears in the gear box. The left gear has the output shaft with the tire on it, and the lower right cylinder represents the worm gear attached to the motor.

Assign a letter to each gear in the system. The gear on the output shaft is A, the gear meshing with it is B, the gear on the same shaft is C, and the worm gear in the lower right is D.

The total ratio is the ratio between A and B times the ratio between B and C times C. Remember, one revolution of a worm gear will advance the corresponding spur gear one tooth, or 1 divided by the number of teeth on the gear. Putting it all together:

Untitled
The composite gear ratio for the wheelchair gearbox.

Wait a minute… that’s just a fancy way of saying the gear ratio is A, or the number of teeth on the output shaft gear. That can’t be right. Or can it?

Remember we measured the gear ratio at 31.8. I did some more estimating and came up with a number closer to 31.9 by counting more tire revolutions (320, or so I thought), but because I can’t exactly line the tire up in the same spot it started from, there was always going to be a little error in the calculation.

And come to think of it, the more tire rotations I counted, the closer my estimation came to 32 exactly. To come up with the 31.8 number I counted 159 revolutions. I was off by one tire rotation. And to come up with the 31.93 number I counted 639 rotations, which meant I was off by about 1.25 tire rotations. Turns out I’m not very good at counting.

At this point you might be wondering why I didn’t use the other encoder to measure the gear ratio with much higher precision (and without all the mess). The output shaft on the gearbox is 17mm diameter, but I mistakenly thought it was 8.5mm. I misread the radius measure in my CAD program and thought it was a diameter measure instead. You can jury rig a 10m ID encoder to fit on an 8.5mm shaft, but not a 17mm shaft. 

Long story short, I like to do things the hard way, and the magic number is actually 32. Exactly 32.

The Magic Number is 31.8

The rotary encoders arrived today. To familiarize myself with them, I decided to use them to try and determine the gear ratio of my wheelchair gearmotors. The idea is that I can rotate the tire a fixed number of times, read the encoder output and then do some math to figure the gear ratio. I’ll need this number for using the wheel encoders with the Ardupilot software.

IMG_4373
The rotary encoder mounted to the wheelchair motor.

Installing this guy was very easy. Peel the cover strip off the adhesive on the back of the encoder and use the conical centering tool to align the base to the shaft. Press it down so it sticks, and then screw everything else into place. Very nice.

The more difficult part is reading the encoder output. To do this I used my old Arduino Uno and did some googling for a sketch that looked close to what I needed (remember I’m a mechanical engineer, not a computer guru). No need to re-invent the wheel, right?

And lo and behold, I found this webpage. And the sketch was pretty much plug and play, short of playing with the baud rates. Not bad for 15 minutes of work!

The encoder I purchased is rated for 900 pulses per revolution. I could have tweaked the sketch so that it measured actual rotations, but I figured I’d just do the math outside of the sketch.

IMG_4374
The setup for measuring the wheelchair gearmotor gear ratio. The encoder and Arduino are measuring input shaft revolutions and I’m measuring tire revolutions with my eyes.

So I taped a pencil to the wheel, hooked it up to a battery and started measuring tire revolutions. After 152 revolutions (measured by aligning the pencil with the motor), the Arduino sketch read 17401196. Dividing that large number by 152 and also by 3600 (it’s a quadrature encoder, so 900 PPR times 4) should give the gear ratio.

The magic number appears to be 31.8. I’m told that gearbox manufacturers like to use strange ratios so that a tooth on one gear doesn’t always contact the same tooth on another gear every revolution. This helps the teeth wear evenly. That’s the only explanation I can think of for this funky number.

I might hook the other encoder up to the output shaft and to get some additional resolution…

Spring is Here!

It’s been a while since I’ve posted, but that doesn’t mean I haven’t been busy. The back yard is starting to really green up and I think the worst of the cold is finally behind us here in Kansas.

IMG_4337
The backyard on this fine spring morning. Winter is finally over!

I purchased a replacement relay board for the one that went bad several of weeks ago. Unfortunately, I didn’t read the fine print and the new relay board requires you to ground the appropriate pin instead of applying 5V to it in order to trigger the relay.

Since I’m now using a high current relay to switch the Sabertooth, I decided to resolder the damaged terminals on the relay board and put it back in the enclosure to switch the high current relay. I’ve taken the wheel chair robot out and tested it, and it is working quite well.

The RTK GPS system is working great, but unfortunately my backyard is still a very challenging environment to work in. Maintaining an RTK fix for 50% of the time is about all I can do. Because of this, I am exploring two different improvements to the wheel chair robot.

Optical Flow

For the uninitiated, optical flow is the concept that modern computer mice use to measure the motion of the mouse. An integrated circuit with a built in “camera” takes rapid (500Hz-ish) pictures. The pictures are very low resolution, 16 bit grayscale or thereabouts, and really small, like 32 pixels square. Using math, the vector difference between each frame is computed, and if you know how far above the surface you are you can then estimate your translation.

The same concept can be applied to our robot wheelchair. Take a camera, point it at the ground, measure how far the camera is above the ground and voilà! With some creative coding, you can estimate your robot’s translation. Optical flow is great because it measures your vehicle’s absolution translation, not some intermediate measure like wheel turns or integrating accelerations to back into your position.

What’s really cool is the Ardupilot code already features optical flow! There’s only one catch… it’s currently only implemented for copter. So for the time being, I’m going to have to either bribe a genius on the internet to port the code to Ardurover, or I’ll have to do it myself. I’ve started playing with the Ardupilot code, but let’s be real. I have no clue what I’m doing.

Wheel Encoders

This is a feature that is already implemented in the Ardurover code. I’m thinking about buying some rotary optical encoders to leverage this feature. For ~$140 I can get two encoders and pretty much plug and play them into my motors.

encoder on motor
The wheel encoders mounted where the brake used to be on the motor. Fits like a mitten!

To properly implement them, I need to figure out the gear ratio on the gear box. I measured it by counting turns of the back shaft on the motor per one wheel rotation and came up with a ratio of  32:1. I thought this was an odd ratio (I was expecting 30:1 or 60:1) so I did some digging and it turns out there’s a little bit more going on in that box than I initially suspected.

To measure the gear ratio, I could just use the encoders and hook them up to an Arduino, measure several wheel rotations and then see how many pulses I get out of the encoder, so I’m not going to bust open the gearbox and start counting teeth. In theory though, this would be the correct way to determine the exact gear ratio.

Some things I’m not sure about:

  1. How much wheel slip is acceptable before the encoders actually start degrading position estimation instead of improving it? Wet grass isn’t nearly as friendly as concrete.
  2. How many pulses per revolution (PPR) do I realistically need? Not much is my guess, but if the Pixhawk can read them, the more the merrier. Where’s the sweet spot?
  3. The wheel encoders help if you can continue to get good absolute positioning information from the RTK GPS. But they’re only as good as your initial position, and you’ll quickly start experiencing drift once you lose your RTK fix. How long can the wheel encoders tide you over between RTK fixes?

For ~$140, I think I’ll take the risk and see how well they work.

Setbacks

Running the wheelchair robot in autonomous mode has been a lot of fun. Seeing it come back to waypoints pretty much dead nuts to the same spot is very satisfying. So I’ve become a little complacent with keeping my hand on the “manual mode” button in mission planner in case the robot veers off toward something it shouldn’t.

And boy did I pay for it today. Remember that sprinkler well in my backyard? Well the robot seemed to remember it too, and I may be buying a new power switch for it this spring. I took my eyes off the robot for just a few seconds and boom, collision.

IMG_3854
The rover V2 running to waypoints autonomously.

Normally this wouldn’t be too frustrating except for the fact that now the left motor doesn’t rotate at all. The right motor though still runs perfectly.

So I start to troubleshoot the problem using the following process:

  1. I made sure the motor still works. I connected the motor wires to the battery terminals and it spooled up just fine. No problem.
  2. I checked continuity across the motor wires to the relays and Sabertooth motor controller. Everything is connected. No problem.
  3. I checked the relays to make sure they weren’t broken, they function as desired. No problem.
  4. I checked the fuses on the motors. Not blown. No problem.
  5. I swap the S1 and S2 wires on the Sabertooth, thinking this would eliminate the Sabertooth as the issue if the left motor suddenly worked and the right motor didn’t. No change, the right motor still responds to RC input, although in a funky way because S1 and S2 are switched. The left motor is still unresponsive. Might be the Sabertooth.
  6. I removed the Pixhawk from the equation by hooking the Sabertooth up to RC input from the receiver directly. Same results, left motor still unresponsive, right motor works.
  7. I also checked continuity across the DB15 cable between enclosures. Everything seems to be connected. No problem.

So from my cursory testing, the Sabertooth seems to have been bricked, at least on the left motor side. So I pull it from the enclosure and take it inside for bench testing.

IMG_4264
The bench setup for checking the Sabertooth. The battery and motor come from an old cordless weed eater. Very handy for this sort of thing.

But after some simple testing, both left and right motor outputs work when hooked up! So what could the issue be?

I’m thinking something got knocked loose during the collision. Nothing else makes sense. I’ll take everything apart and rebuild it just to make sure, but the lack of a smoking gun is somewhat worrisome.