I’ve spent most of this winter re-wiring the robot mower. In hindsight, I should have spent a lot more time planning the wire runs. I made a lot of design choices about how the chassis should look and where enclosures should be located that are inappropriate given my more complete understanding of how the wires need to be connected between components.
At some point you have to build something that’s not perfect and work through the bugs later. It’s against my nature to operate that way, but if I hadn’t started building the robot mower in reality at some point, it would still be a picture in my CAD program.
In the rest of this post, I’ll describe some wiring related improvements I’ve been making to the robot mower.

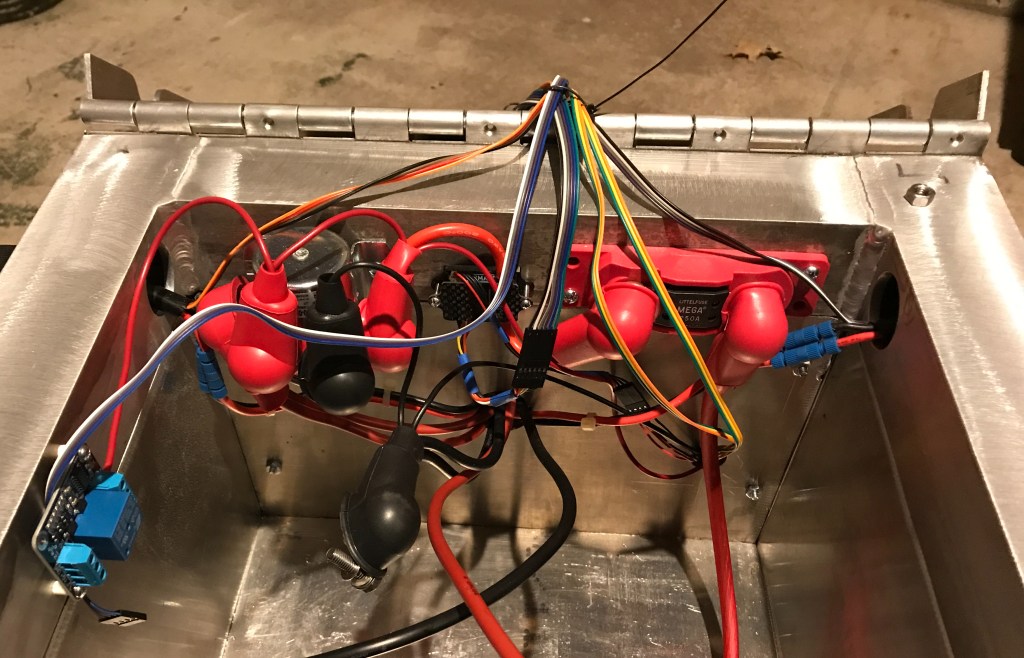
The picture above is how the power enclosure used to look. It used to contain the Sabertooth 2X60, the voltage/current sensor, the BEC, a positive and negative terminal stud, a small 5V relay board to trigger two larger 50A relays, a power switch and an XLR charging port. It was a mess, to say the least.

The reorganized enclosure contains the Sabertooth 2X60, the BEC, power switch, XLR charger port, and a motor controller for the deck motors exclusively.
The reason I tried to pack so many components into the power enclosure was so I didn’t have to put anything other than wires in the battery bay. It is a battery bay, after all. I was hoping to make an entirely modular power enclosure I could build up separately from the robot and then basically bolt on.
While that’s nice in the CAD software, in reality it didn’t work. If I’d selected a larger enclosure it might have been possible. But an unintended side effect of putting everything in one enclosure is that you have to run 24V and ground into the enclosure, but you then turn right around and run a ton of wires right back out of the enclosure.
As I have learned, relays are not a great way to control motors, especially if they’re using a lot of power. And on top of that, those “200A” relays were kind of a scam. They terminals are only rated for 50A, and I’m pretty sure I managed to fry one out in the field. I decided to replace them with a single channel motor controller that can supply up to 200A of current.
The nice thing about having a motor controller driving the deck motors is that I can dial back the blade speed if the mower is cutting the grass just fine. There’s no sense in running at 4800RPM when 3600RPM will do the job. I’m hoping this will allow the robot mower to run for a longer period of time.

I was using wire nuts to connect all of the deck motor wires together originally. I wanted to make things a little more professional than that, so I decided to replace the wire nuts with a fuse block.
In theory, the deck motors should only use about ~30A each at steady state, and with the new motor controller, I think I can spool them up slow enough to where a fuse doesn’t blow. We’ll see how good this assumption is soon.
One thing I like about the fuse block is it allows me to easily disconnect power from the deck motors: just pull the fuses. This makes safe troubleshooting easier. The fuses will also provide a layer of protection for the motor controller. But at the same time, a blown fuse creates exactly the situation that caused my wire failure. I intend to also have a Zener diode between the supply terminal and ground to hopefully protect against this situation, too.
All of the power in the robot now runs through a MEGA fuse, and from there it runs through the voltage/current sensor. After that, it runs through a solenoid, which supplies power to the drive and deck motor controllers. The solenoid can only be powered if the E-stop switch and RC relay board are in safe states.
I also put rubber boots on every exposed terminal, including the batteries. They look a little ridiculous on that solenoid, but they are adequately insulated.

The RC relay board is controlled by a switch on the RC transmitter. If the RC relay board doesn’t detect a valid RC signal, it will open the relay. This allows me to have a remote E-stop switch.
One thing I don’t like about this RC relay board: when you power it on, it automatically closes for a second, then goes open. That’s a really crappy design, in my opinion. But without the Pixhawk armed it’s kind of a moot point.

I also finally got around to putting a proper ground plane under my GNSS antennas. We’ll see how much this improves performance.
I hope to have these wiring improvements wrapped up soon. The grass is green and growing out here in Kansas!

Very nice. In the wire-blow post you did make a mention of putting too much into your battery box, I do hope you wont regret putting all that fancy gear there now. That said, the new box looks very neat indeed. Could you advise on your mower motor controller choice please ?
LikeLike