Back when I was ordering hardware for the robot lawn mower, I came across a smoking deal on some 5/8-11 X 5.5in long socket head cap screws. I was browsing Grainger’s website and they had a deal for a box of five for $1.92. Hot dog! Those things are $4+ a pop at most other places. I placed an order without thinking twice.
I opened the box up today when I was putting the front caster assembly together and found this newspaper page stuffed inside the box. Talk about a blast from the past. I assume this means these screws sat in that box for almost 12 years before they sold. No wonder they were on sale!
A newspaper page I found inside my box of five 5/8-11 X 5.5in long socket head cap screws. The reverse of this page was a full page ad for liquor store in New Jersey.
Looking at the picture of those girl scouts got me thinking about how short life is. There’s a good chance those girls are probably out of college by now. I wonder if any of them even remember the Girl Scout Sunday events on March 11, 2007. It was probably a big deal at the time, but 12 years later, I’m sure it’s but a distant memory to most of them.
Seeing this newspaper page was a good reminder to cherish what’s really important in life: family and friends. The Mower Project is a lot of fun, but without good friends and family to share my successes, failures, dreams, and goals, it’s all a very empty exercise.
And beyond that, it’s sobering to look forward and think about what will really matter 12 years from now. Who knows where the mower project will take me? The work I put in here could be a defunct blog 12 years from now. It could be something else, I’m not sure what. But if it comes at the expense of time spent with family and friends, it will surely not have been worth the effort.
This Christmas, I hope you all have a wonderful time with those closest to you, and I hope you make some beautiful memories with your loved ones, on which you’ll look back on 12 years from now and smile. That’s a project worth every minute.
I’ve received a few of the weldments back from the shop. While I wait for them to finish fabricating the mower deck weldment I’ve started to put some components together.
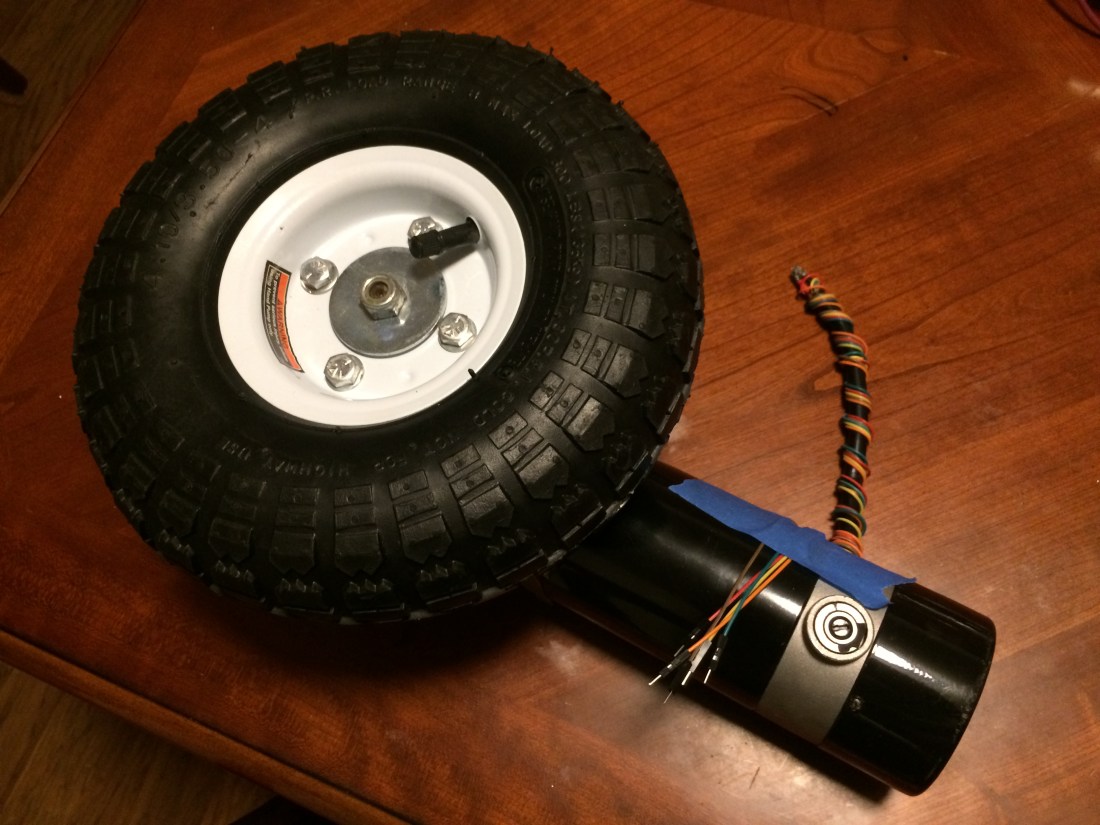
How I initially had the wheel encoders installed. You can see a little rubber grommet in a hole I drilled in the motor dust cover near the bottom of the picture.
Back when I installed the wheel encoders on the wheel chair motors, I stupidly drilled a hole through the dust cover on the back of the motor so I could run data wires to the encoder. In hindsight, I should have run them through the little sleeve that the power and brake wires were routed through.
I had to take the brake off to put the encoder on the motor anyway, so there was a perfect amount of space for the encoder wires once the brake wires were removed from the sleeve.
Because you can’t undrill a hole I purchased a pair of cheap gear motors off eBay for $80. I mostly wanted them for the motor dust cover, but it will be nice to have spare parts on hand in case I need them down the road.
I took the aluminum back piece off the motors and removed the two white wires you see in the picture. The hole you see them sticking through was where I routed the data cables for the encoder.
Pro tip for dealing with these motors: There are two Philips head M5x150 screws holding the aluminum back piece to the mounting plate. These screws have lock washers under them. The screws are ridiculously soft and easy to strip the heads on. If you want to remove them so they’re still reusable, it’s best to use an impact driver. It’s extremely easy to strip them using a screwdriver.
I managed to strip the screws on both motors before I drilled them out and discovered this, so heads up to anyone modifying the motors like I am here. I ordered replacements that were socket head cap screws instead, hoping to avoid this issue in the future.
Once you have the aluminum back piece off, you’ll see wires inside like this:
The inside of the aluminum back piece.
The inside is going to be quite dusty with a lot of little brush particles inside. I blew it out with compressed air after taking this picture.
You can pull the white wires through pretty easily, but I had to bend the black wire terminal so I could get access to the hole to feed the encoder data cables to. I also ended up removing the brushes so I’d have more room to work.
Once you’ve got the white brake wires removed, you can pretty easily push the encoder wires through. The end result looked like this:
How I should have routed the encoder data cables from the start.
One thing I realized doing this is that it would have been pretty easy to drill holes into the aluminum back piece for screwing the encoder base down. I selected an adhesive backed encoder because I didn’t want to mess with it. But going to the trouble to take it apart like this changes that calculus. If I find myself doing this again, I’ll order an encoder that has clearance holes for mounting screws.
The completed motor assembly with the Harbor Freight tire.
After I had everything wired up, I tested the encoder to make sure it was working well. Nothing like having to tear down a motor after it’s already on the robot to fix a loose wire.
I also wanted to make sure that running the data cables next to the power supply cables wouldn’t cause any issues. I didn’t find any during the bench test. Fingers crossed none pop up in the field either.
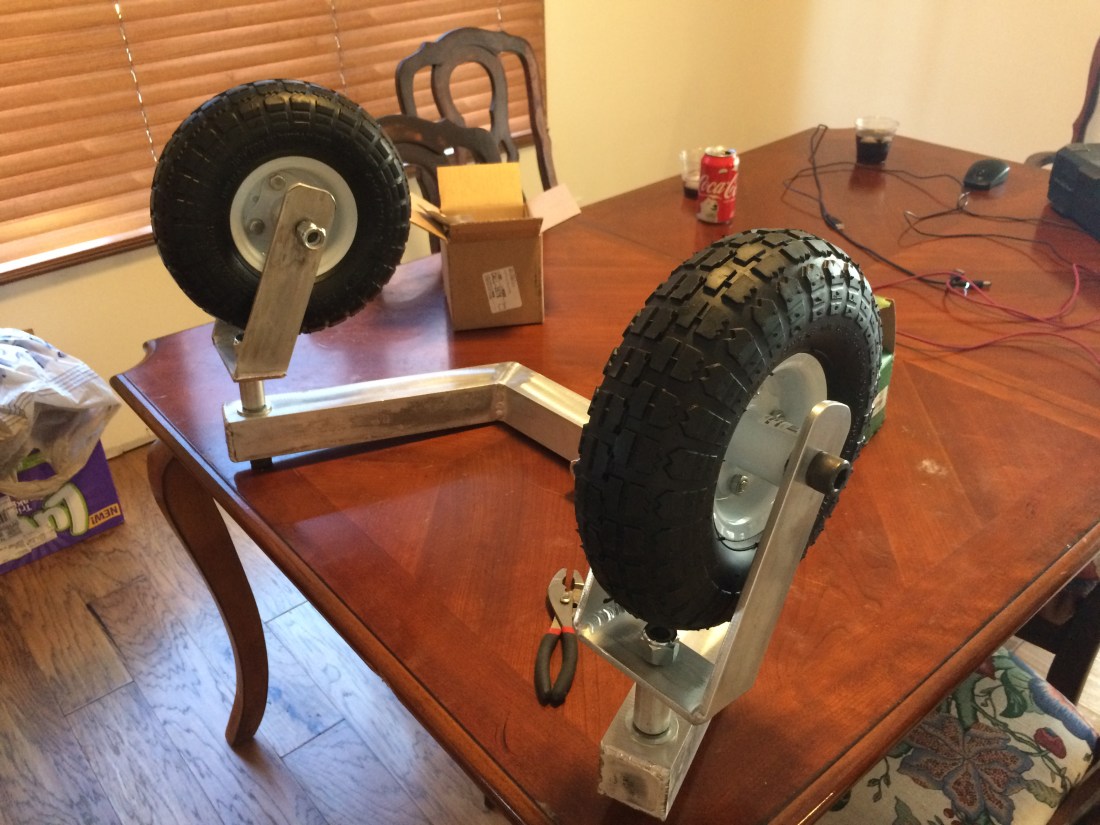
The front caster assembly. A little bigger than I expected!
I used 5/8-11 screws for all the connections in the front caster assembly. I wanted to standardize on one size so I could buy several of one type of lock nut. Unfortunately the width of a 5/8-11 lock nut is 0.9375in and I don’t have a wrench that size. I also don’t have a hex wrench for the socket head cap screws either. The picture above shows everything hand tightened. I’ll have to go pick up the right tools to get this all put together.
As I’ve been working on the mower project, I find myself returning to a few blogs and websites to see how other people are trying to automate lawn mowers. It’s fun seeing different solutions to the problem, and I use their successes and failures to spur my own creativity.
This is a list of innovators that I’m aware of in the autonomous lawn mower realm. If you know of some folks that I haven’t found yet, post a comment and I’ll add them to this list!
MowBotix
These guys had automated a fully autonomous riding lawn mower back in 2017, so I think they win the prize for first large scale autonomous lawn mower. They went silent about a year ago and recently posted on their blog that they’re moving toward a more holistic terrestrial software solution that isn’t just for mowers.
Greenzie
Every once in a while I’ll do a Google search for “autonomous lawn mower” to see what I can find. That was how I found the folks out at Greenzie. They appear to be taking the same approach MowBotix did: start with a riding lawn mower and retrofit it with a suite of electronics and sensors. Their solution looks a lot more robust than MowBotix’s, but also quite a bit more expensive. Their Twitter account is a fun time, lots of cool demonstration videos.
Left Hand Robotics
As far as I can tell, the folks over at Left Hand Robotics started out trying to make an automated snow plow. Based in Longmont, Colorado, I’m sure that’s a very welcome solution. It appears they took their snow plow platform and put a mower deck on the front. Voila! Instant mowing platform.
The downside? It appears these bad boys cost an arm and a leg. Or perhaps just a left hand? I’ll show myself the door. This source says their snow plow solution costs $55,000 and has an annual subscription fee of $4,250. However, for that price I’m sure the system works very well. Their videos are quite impressive.
Deep South Robotics
Robo Robby over at Deep South Robotics has a full up riding mower automated with linear actuators to run the steering arms. With his software and hardware chops it appears to be a very robust solution. I admire his willingness to share his methods along with his successes and failures. The comments on his blog are quite informative. Every time he posts, I learn something new.
Evatech
Well, kind of. Evatech makes a series of radio controled lawn mowers, and BitDog from the ardupilot forums took one and added some special sauce to automate it. I admire the simplicity of this solution. It seems to be quite plug and play. But I’m left wondering why Evatech doesn’t take the leap and automate their platform themselves. Their machines are on the pricy side, but being gas powered are probably pretty reliable.
Kenny Trussell
Kenny was the first person I know of (other than possibly the folks at MowBotix) that used an RTK GPS system on a riding lawn mower. He continues to improve his mower, and I look forward to some updates of his progress soon! Kenny shared a very useful waypoint generation program for creating a mower mission in Mission Planner. If I ever get my mower finished, I will likely be trying it.
The Ardupilot Forum
There are quite a few folks on the Ardupilot forum that are working on their own solutions. I won’t post names here, but a cursory search will bring up several of them.
Mean Green Mowers
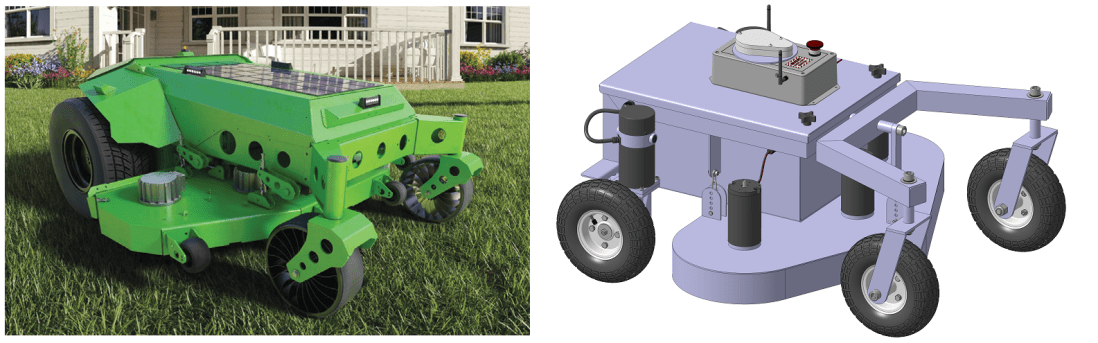
Mean Green Mower’s autonomous mower. Great minds think alike?
These guys have partnered with a company called Kobi to build an autonomous robot whose anatomy looks surprisingly familiar. I think the solar panel is a bit over the top though. When your deck motors pull multiple kW’s of power, a 200W solar panel isn’t going to be very helpful in my opinion. But it’s great marketing, especially when your company has “green” in the name.
One thing is for sure, it’s an exciting time to be working on autonomous lawn mowers!